Drilling a hole in a clay pot requires measured care to preserve its integrity while achieving clean, precise results. Unlike ceramic or plastic, clay is poriferous and brittle, making the procedure delicate yet entirely achievable with the right tools and technique. Whether you're crafting a cosmetic planter, install drainage holes, or personalize your pottery, knowing how to drill a hole in a clay pot right ensures lasting quality. This guide walks you through every step, from preparing materials to cease touches, so you can work confidently with clay without snap or damaging it.
Materials and Tools You ll Need
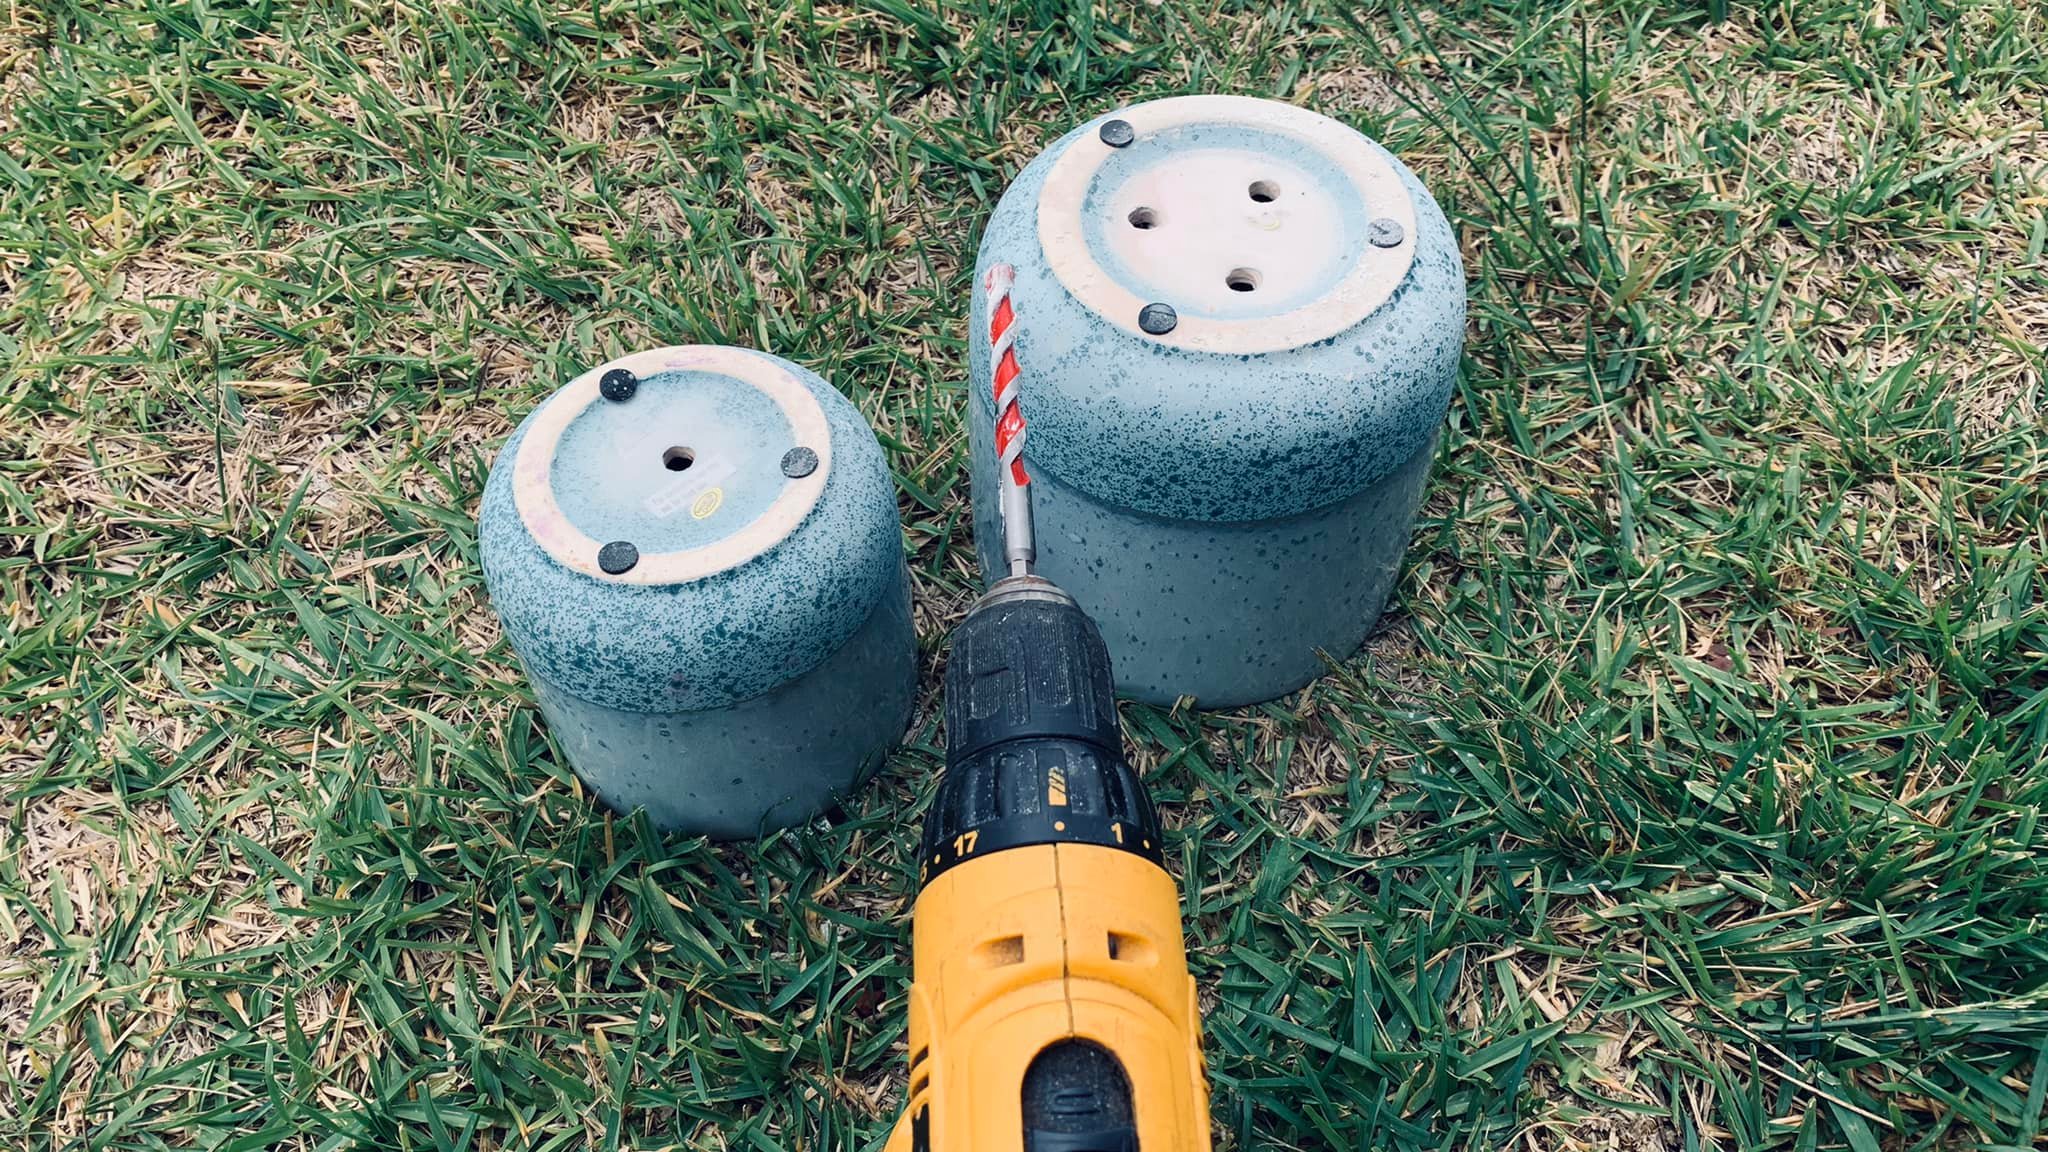
To begin, gathering the essentials to protect both your pot and your tools:
- A sharp drill bit worthy for clay (rather a pocket-sized spade or hole saw bit, 3 8 mm diameter depending on desire hole size)
- A sturdy drill or impact driver with variable zip control
- A stable work surface, such as a wooden board or rubber mat
- Masking tape or a small piece of report to mark the bore spot
- A minor container or towel to catch excess clay dust
- Optional: a damp cloth to lightly dampen the area before drilling for reduced cracking
Note: Using a high speed drill increases risk of overheat; opt for lower speeds with clay to prevent caloric stress and cracking.
Step by Step Guide to Drilling a Hole in a Clay Pot
- Prepare Your Workspace: Lay your clay pot on a flat, non slip surface. Cover the region around the intended hole with a damp cloth or towel to minimize dust and trim rubbing. This also helps absorb vibrations that could shift the pot during exercise.
- Mark the Drilling Point: Choose the exact spot where you want the hole. Use a pencil or fine marker to draw a pocket-sized dot this acts as your eye. For even alignment, especially on round pots, pose a piece of disguise tape over the center mark and trace a circle with a compass or cup to keep symmetry.
- Secure the Pot: Place the pot firm on your act surface. If needed, wedge a pocket-size towel under the establish to steady it clay shifts well under pressure.
- Select the Right Bit: Choose a fine point drill bit made for soft or poriferous materials like clay. Avoid metallic tipped bits unless necessary, as they may crack the surface. A spade bit or pocket-size hole saw works best for clean, controlled holes.
- Start Slow and Steady: Attach the bit securely to your drill and set the speed to low. Begin drilling at the marked point with gentle, consistent pressure. Let the bit do the work avoid forcing it, which can cause slipping or uneven edges.
- Maintain Control and Cooling: Periodically pause to wipe away dust and check progress. If heat builds up, stop briefly to let the area cool. Reapply light moisture to the surface if dust becomes too dry, reducing friction and preventing micro cracks.
- Drill Gradually to Desired Size: Once the initial hole forms, slowly increase depth or width as needed. For larger holes, deal using a step down method drill a smaller pilot hole first, then enlarge cautiously.
- Clean the Hole: Remove all debris with a soft brush or compressed air. Wipe the interior with a dry cloth to eliminate dust, secure no particles remain that could sabotage structural unity.
| Step | Action |
|---|---|
| 1 | Prepare workspace with damp cloth and stable surface |
| 2 | Mark heart point distinctly with pencil or tape |
| 3 | Use low speed drill with appropriate clay bit |
| 4 | Drill slowly, apply steady light pressing |
| 5 | Pause to open dust and check alignment |
| 6 | Adjust depth gradually for precision |
| 7 | Clean and inspect final hole |
Always prioritize slow, controlled practice speed increases the chance of cracks or breakage.
When drilling clay pots, patience is your greatest ally. Rushing leads to uneven edges, dust clouds, and possible damage. Take time to align decent and preserve ordered pressure. Using the right tools and keeping the surface cool ensures clean, functional holes that last. Whether for drainage, hang, or decoration, dominate this technique transforms clay from fragile to versatile. With practice, drill clay pots becomes a simple, rewarding skill that enhances your craftsmanship and creativity.
Related Terms:
- bore holes in glass pottery
- drilling ceramic pot without cracking
- can you drill ceramic pottery
- ceramic pots with drainage holes
- practice holes in ceramic pots
- drill ceramic pot without cracking