Mastering the art of mastermind information in Excel is a skill that can significantly raise your productivity and efficiency. One of the fundamental tasks in Excel is the ability to displace row in Excel. Whether you are managing a large dataset, form financial records, or simply pick up your spreadsheet, know how to displace rows effectively can relieve you time and reduce errors. This usher will walk you through the various methods to move rows in Excel, from introductory drag and drop techniques to more advanced VBA scripting.
Understanding the Basics of Moving Rows in Excel
Before plunk into the specific methods, it's all-important to realize the basic concepts of moving rows in Excel. A row in Excel is a horizontal line of cells that runs across the spreadsheet. Each row is name by a number, depart from 1 at the top. Moving a row involves selecting it and then relocate it to a different position within the same worksheet or even to a different worksheet.
Method 1: Drag and Drop
The simplest way to locomote row in Excel is by using the drag and drop method. This method is visceral and does not take any advanced cognition of Excel functions. Here s how you can do it:
- Select the row you require to move by clicking on the row number on the left side of the spreadsheet.
- Hover your mouse arrow over the edge of the choose row until the pointer changes to a thwart arrows icon.
- Click and hold the left mouse button, then drag the row to the desired location.
- Release the mouse button to drop the row in the new position.
Note: This method is best for travel a single row or a small number of rows. For larger datasets, consider using the cut and paste method.
Method 2: Cut and Paste
For more precise control over where you displace your rows, the cut and paste method is extremely efficient. This method allows you to move rows to any placement within the same worksheet or to a different worksheet. Here are the steps:
- Select the row (s) you need to travel by chatter on the row number (s).
- Right click on the selected row (s) and opt "Cut" from the context menu, or press Ctrl X on your keyboard.
- Click on the row number where you require to insert the locomote row (s).
- Right click on the selected row and choose "Insert Cut Cells" from the context menu, or press Ctrl V on your keyboard.
Note: When using the cut and paste method, control that you do not overwrite important data. Always double check the finish before pasting.
Method 3: Using the "Move or Copy" Dialog Box
For more progress users, the "Move or Copy" dialog box provides a powerful way to move row in Excel. This method is particularly utilitarian when you involve to move rows to a different worksheet within the same workbook. Here s how to do it:
- Select the row (s) you want to travel.
- Right click on the selected row (s) and choose "Cut" from the context menu, or press Ctrl X on your keyboard.
- Go to the "Home" tab on the Ribbon and click on the "Find Select" button in the "Editing" group.
- Choose "Go To" from the dropdown menu.
- In the "Go To" dialog box, click on the "Special" button.
- Select "Row" from the list of options and click "OK".
- In the "Move or Copy" dialog box, select the destination worksheet from the "To worksheet" dropdown menu.
- Choose the cell where you require to insert the moved row (s) in the "To cell" battleground.
- Click "OK" to complete the displace.
Note: This method is idealistic for moving rows to a different worksheet. Ensure that the goal worksheet is right selected to avoid datum loss.
Method 4: Using VBA Scripting
For users who involve to automate the procedure of travel rows, VBA (Visual Basic for Applications) scripting is a powerful creature. VBA allows you to write custom scripts to travel rows based on specific criteria. Here s a canonical example of a VBA script to move a row:
Open the VBA editor by pressing Alt F11 on your keyboard. Insert a new module by tick on "Insert" "Module". Copy and paste the following code into the module:
Sub MoveRow()
    Dim ws As Worksheet
    Set ws = ThisWorkbook.Sheets("Sheet1") ' Change "Sheet1" to your sheet name

    Dim lastRow As Long
    lastRow = ws.Cells(ws.Rows.Count, "A").End(xlUp).Row

    Dim i As Long
    For i = lastRow To 1 Step -1
        If ws.Cells(i, 1).Value = "Criteria" Then ' Change "Criteria" to your condition
            ws.Rows(i).Cut Destination:=ws.Rows(1) ' Change the destination row as needed
        End If
    Next i
End Sub
Close the VBA editor and run the script by pressing Alt F8, take "MoveRow", and clicking "Run". This script will move any row that meets the specified criteria to the first row of the worksheet.
Note: VBA scripting requires some knowledge of programming. Ensure you understand the script before escape it to avoid unintended datum changes.
Common Issues and Troubleshooting
While move rows in Excel is generally straightforward, you may encounter some mutual issues. Here are a few troubleshoot tips:
- Data Overwrite: Ensure that you do not overwrite crucial information when moving rows. Always double check the destination before pasting.
- Formula Dependencies: Be cautious when travel rows that contain formulas. Moving a row may break formula dependencies, starring to incorrect calculations.
- Hidden Rows: If you are having trouble selecting a row, it may be hidden. Unhide the row by take the rows above and below it, right tick, and choosing "Unhide".
- VBA Errors: If your VBA script is not work as expected, check for syntax errors and see that the sheet and cell references are correct.
Advanced Techniques for Moving Rows
For users who ask to perform more complex datum manipulations, Excel offers several advanced techniques for moving rows. These techniques can help you automate repetitious tasks and ameliorate efficiency.
Using Filters to Move Rows
Filters can be used to quickly identify and move rows establish on specific criteria. Here s how to use filters to move rows:
- Select your data range and click on the "Data" tab on the Ribbon.
- Click on the "Filter" button to utilize filters to your data.
- Use the dropdown menus in the header row to filter your information base on specific criteria.
- Select the filtered rows and use the cut and paste method to travel them to the desired location.
Note: Filters are a powerful tool for quickly name and move rows based on specific criteria. Ensure that your data is aright trickle before moving rows.
Using PivotTables to Move Rows
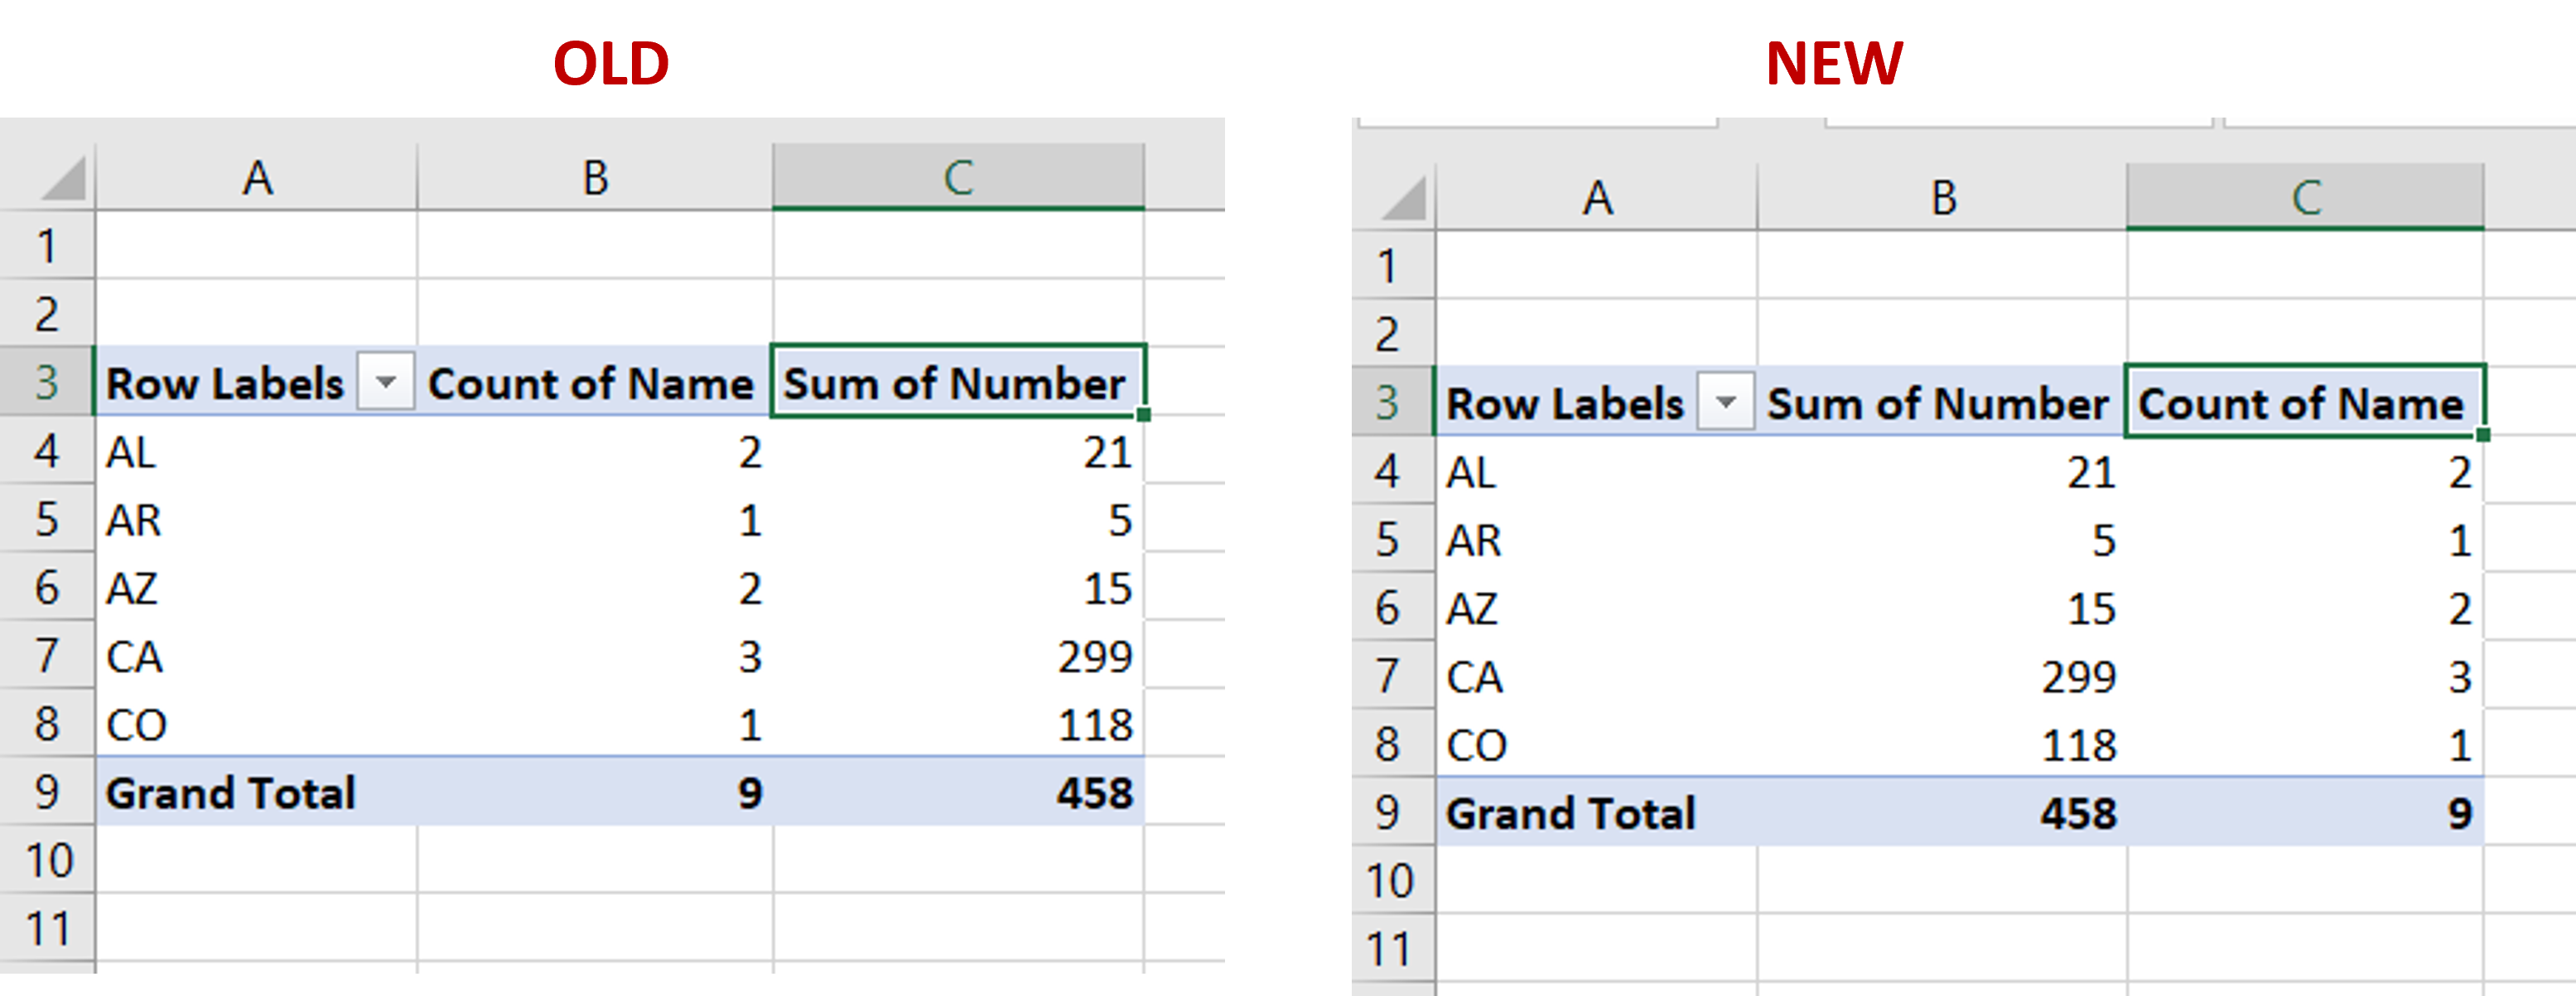
PivotTables can be used to summarise and reorganise datum, get it easier to move rows based on specific criteria. Here s how to use PivotTables to displace rows:
- Select your data range and click on the "Insert" tab on the Ribbon.
- Click on the "PivotTable" button to make a new PivotTable.
- Drag and drop the fields you need to resume into the reserve areas of the PivotTable.
- Use the PivotTable to identify the rows you want to move and use the cut and paste method to travel them to the desired placement.
Note: PivotTables are a potent tool for summarizing and reorganizing information. Ensure that your PivotTable is aright configured before go rows.
Best Practices for Moving Rows in Excel
To ensure that you displace rows in Excel expeditiously and accurately, postdate these best practices:
- Backup Your Data: Always create a backup of your data before execute any major data manipulations. This will help you recover your data in case of errors.
- Use Undo: If you make a mistake while move rows, use the "Undo" feature (Ctrl Z) to quickly revert the changes.
- Check for Dependencies: Be cautious when travel rows that contain formulas. Ensure that travel the row does not break formula dependencies.
- Use Filters and PivotTables: For complex information manipulations, use filters and PivotTables to quickly name and move rows free-base on specific criteria.
- Automate with VBA: For repetitious tasks, consider using VBA script to automate the process of moving rows.
By following these best practices, you can assure that you displace rows in Excel efficiently and accurately, saving time and reducing errors.
Moving rows in Excel is a fundamental skill that can importantly heighten your productivity and efficiency. Whether you are managing a large dataset, organizing fiscal records, or simply houseclean up your spreadsheet, know how to locomote rows efficaciously can preserve you time and trim errors. By subdue the several methods for moving rows, from basic drag and drop techniques to more boost VBA scripting, you can get a more proficient Excel user.
From the simple drag and drop method to the more advanced VBA script, each technique has its own advantages and use cases. By understanding these methods and postdate best practices, you can ensure that you locomote rows in Excel efficiently and accurately. Whether you are a founder or an advanced exploiter, mastering the art of moving rows in Excel is a valuable skill that will function you good in your datum management tasks.
Related Terms:
- drag row in excel
- locomote row in excel shortcut
- move row up in excel